07 Mar REDCap Tip of the Month: How to Create Test Records
When you are designing forms, REDCap will show you a preview of the forms you are building. But it will not show if your branching logic or calculations actually work as designed.
To test logic and calculations, you will need to create test records. This post covers how to create test records, as well as how to test your longitudinal projects and surveys.
How to Create Test Records as a User
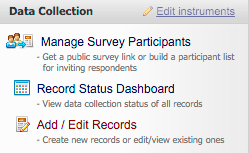
The easiest way to create a test record is by navigating to the “Add / Edit Records” feature in the “Data Collection” menu.
Depending on whether or not the “Auto-numbering” feature is turned on, you can create a new record. If “Auto-numbering” is turned off, you will see the following menu.
Typing in a new unique record ID will create a new record. If you type in an existing record ID, REDCap will take you directly to that record.
If “Auto-numbering” is turned on, click “Add new record” to create a new record.
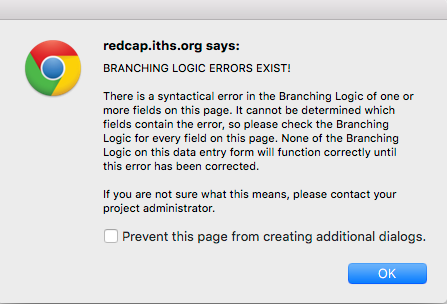
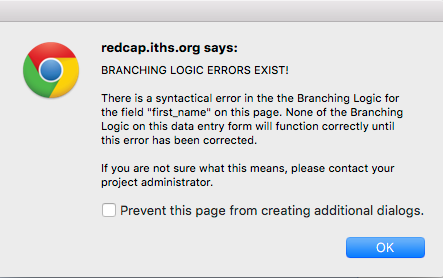
Once you’ve created a test record, go through all the forms/surveys you want to test. If you encounter an error, REDCap will show you a popup with an error message. Read the error message carefully to get a clue where the error occurs.
Additionally, you might want to be on the lookout for unexpected behavior. You might have gotten the coding correct, but the code might not do what you expect or want it to do. The only way to discover these types of errors is by testing often and frequently.
Generic Error Message
Specific Error Message
Test records created in development mode can be automatically deleted when the project is moved to production mode. Or you can erase manually in the “other functionality” tab by clicking “erase all records.” (Only available in development mode).
How to Test Longitudinal Projects
Testing is especially important for longitudinal projects with cross-event logic or calculations.
In longitudinal projects, you will need to define arms and events and subsequently assign your forms to appropriate events before you can do any testing. You can do that in the project setup page with “Define My Events” and “Designate Instruments for My Events.”
The easiest way of creating a test record is by going to the “Add / Edit Records” feature in the “Data Collection” menu.
Depending on whether or not the “Auto-numbering” feature is turned on, you can create a new record.
If “Auto-numbering” is turned off, you will see the following menu.
First, select the appropriate arm in which you want to create a new record (provided you have more than one arm). Typing a new unique record ID will create a new record. If you type an existing record ID, REDCap will take you directly to that record.
If “Auto-numbering” is turned on, click “Add new record for the arm selected above” after selecting the correct arm in the dropdown to create a new record.
After you have created a record, you will be taken to “Event Grid” for that particular record. Clicking on any of the grey dots will take you directly to the corresponding form.
Once you have created a test record, go through all the forms/surveys you want to test. If you encounter an error, REDCap will show you a popup with an error message.
How to Test Surveys
First, navigate to the “Manage Survey Participants” feature in the “Data Collection” menu, which is the easiest way to test a survey.
To test the very first survey in your project, open the survey via the “Public Survey URL.” You can either copy the link into a browser or click “Open public survey,” which opens the survey in a new tab.
This method will also work to test chains of surveys, provided that you set up a survey queue or turned on the “auto-continue” feature for your surveys.
If you have surveys in multiple arms, REDCap will generate a unique public survey link for each arm.
Once you have created a test record, go through all the forms/surveys you want to test. If you encounter an error, REDCap will show you a popup with an error message.
Have questions about this tip? If so, please email our REDCap Administrator.


